Sous-Vide Episode 1
Most people who have a passion for cooking can be divided into two camps: those meticulous souls who would revel in freshly baked pastries following recipes to analytical-balance precision, and of course, those who even when equipped with a detailed recipe, having complete disregard of units and measures, would add or remove certain ingredients to their liking and adjust the amount of seasoning to their taste. In reality this is less of a dichotomy but more of a spectrum. I’d like to think myself as more towards the second type. In everyday cooking, the tolerance is pretty high, so who cares if you added three pinches of salt instead of two in your beef stew?
Now, baking is a whole different story. The reason for the required higher precision has to do with the chemistry happening in honestly almost every single step: from mixing the flour with water and kneading the dough where those gluten molecules cross-link, all the way to the pastry in the oven where Maillard reaction happens at a certain rate above certain temperature. There are treatises on this subject matter and knowing some chemistry and having an attention-to-detail mentality really helps you become a good baker.
Naturally, some of our most curious minds would start to ask the question: can we apply the same scientific precision to the preparation of other types of food? This question, addressed by pioneers in the 1960s by pioneering French cooks and engineers, opens up a whole new world came to be known as sous-vide.
what is sous-vide
Sous-vide literally means “under the vacuum”, due to the fact that most food is sealed in plastic bags to be cooked in this method. However the actual defining characteristic of this method is the low cooking temperature required. I will not delve into the chemistry at play here, but to get yourself started, Cooking for Geeks is a superb book which has a chapter on this topic. In simple terms, with sous-vide, you cook your food at a temperature high enough to kill bateria that cause food-born illnesses, but low enough to maintain its tender texture.
It used to be that lab-grade equipments that cost $1000+ are needed for such tasks. However, in recent years as it becomes increasingly popular among home-cooks, many commercial products emerged to fill in the gap. Some units are on sale on Amazon for less than $100! However, since I am not so sure if I want to make any commitment even though I’ve heard countless times this is an alledgedly amazing technique, and being a poor grad student I am not going to fork out this $100 just yet. Therefore I turned to my lab equipment for some inspirations.
Which brings to our project today: makeshift ghetto sous-vide in a physics lab.
sous-vide in the lab
Note that this is not some fancy chemistry lab with commercial circulating water baths achieving temperature stability less than 0.1 °C. We have fancy lasers, optics, UHV chambers, powerful current supplies and the like, but in terms of temperature control, not so much. After looking around with some creativity in mind, I gathered some stuff:
- An old pot sitting in the kitchen
- A hot plate / stirrer
- Some heater tapes and theromocouples
- Omega temperature controller
I figured that without a recirculation system I am not going to get the temperature stability anywhere less than 1 degree C. So I need to cook something that is fairly forgiving in the sous-vide world. No eggs, for example. I researched a bit online to find that people suggest certain cuts of beef for the first attempt, like rib steaks, briskets, tri-tips, NY strip, etc. Off we go to the grocery then!
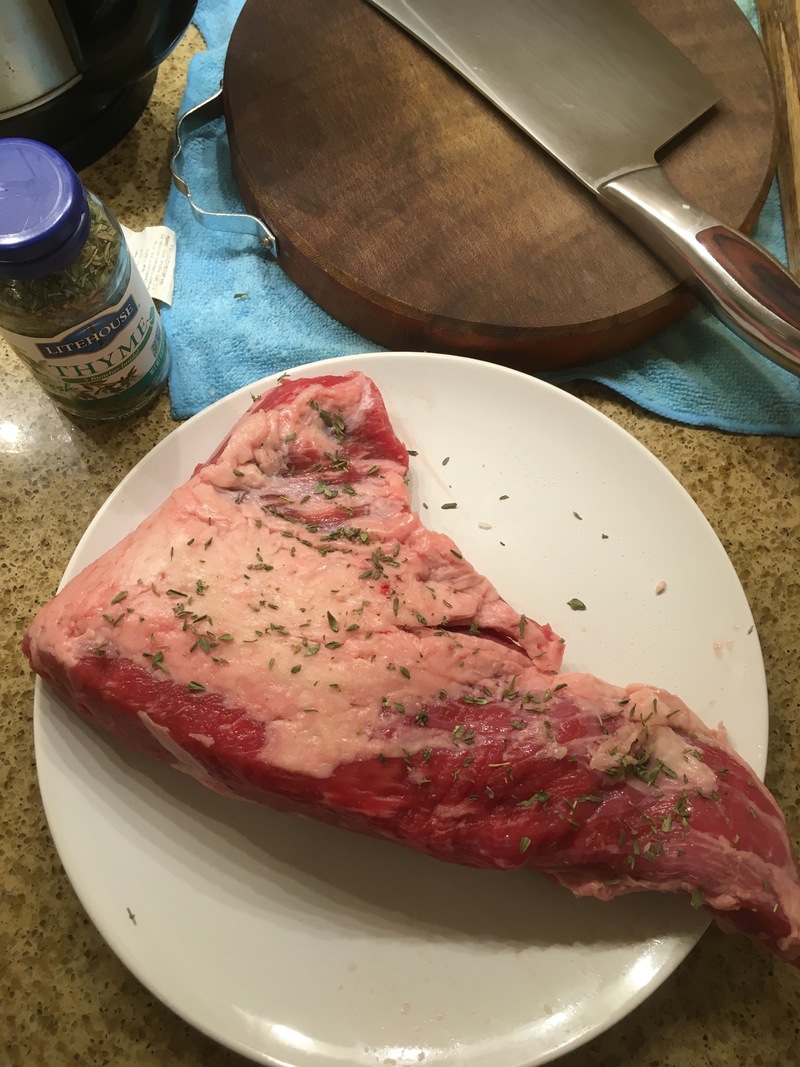
I came back from Safeway with a nice cut of tri-tip, rubbed it with salt and thyme, and sealed it in a Ziplock bag. Some people suggest putting in a little bit of olive oil for better contact with the seasoning, but I forgot to do so this time.
Then I headed back to the lab! The plan was to use the hot plate to heat up the pot. I know that this is a shitty hot plate, so I won’t rely on it to maintain the pot at the target temperature. Instead, the hot plate is used to provide part of the heating power, while the rest is going to be handled by heater tapes 1. We happen to have a spare Omega temperature controller2, so naturally that is going to be my PID controller. The temperature sensor is going to be simply a K-type thermocouple. With all that, I finished my initial setup, as shown in the photo below:
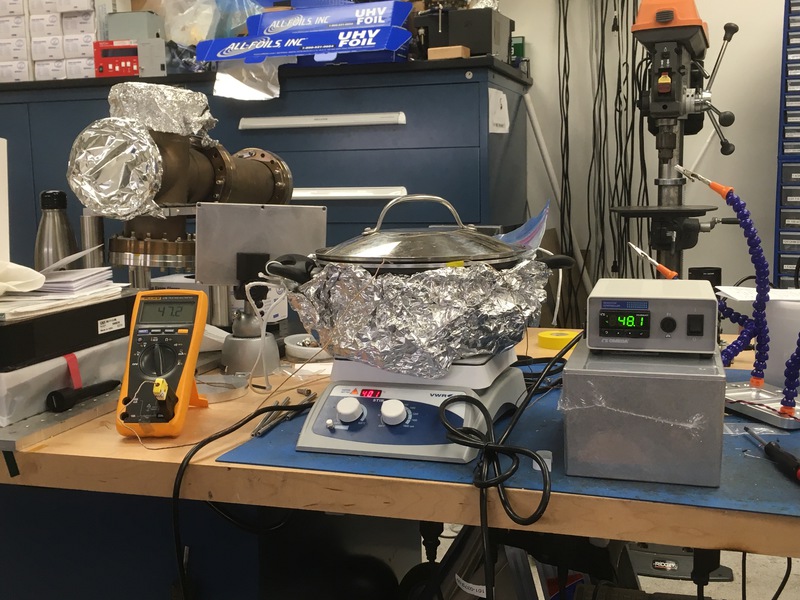
I am pretty happy with this setup except for one thing - there’s no forced circulation of the water. Note that water is a very bad thermal conductor, this will almost certainly result in temperature gradient across the pot. Hmm… Oh! I realized that our hot plate doubles as a stirrer! However our lab doesn’t really use this functionality, so we don’t have a stir bar. But, isn’t the stir bar just a magnet in a convenient shape? We’ve got magnets! Check this out:
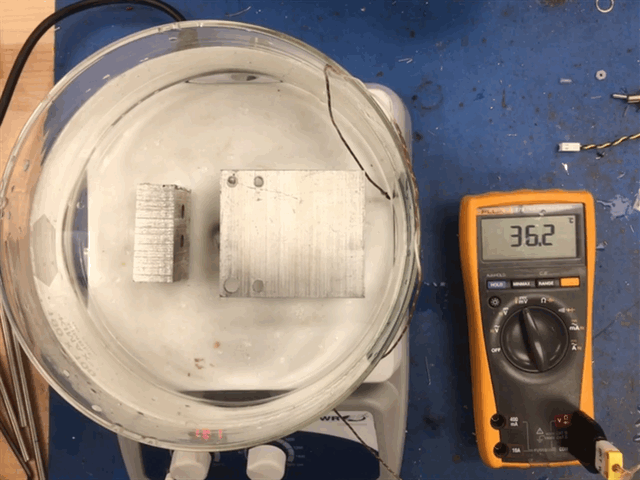
Voila! Works like a charm. The additional aluminum pieces are there to provide a platform for the plastic bag to sit on. So, equipped with this stirrer, I’m ready to put the tri-tip in!
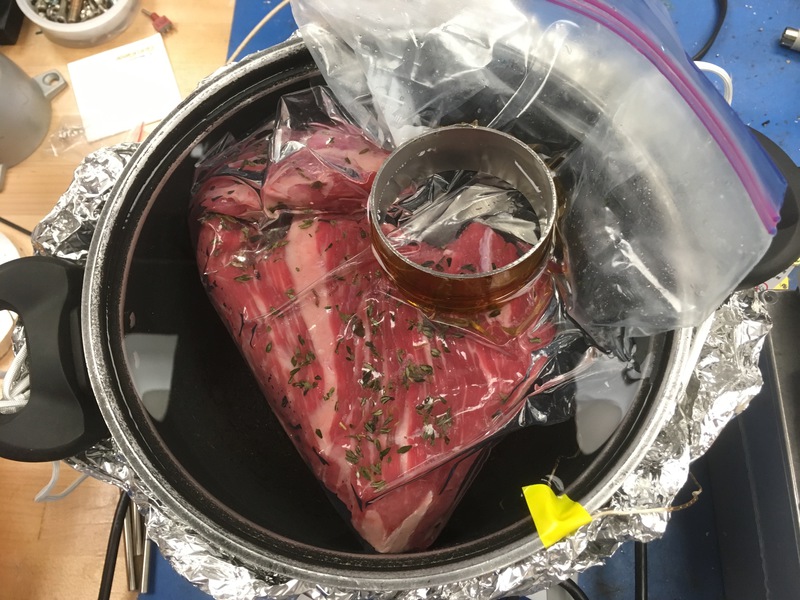
Note that the air inside the Ziplock bag is removed by submerging it in water, squeezing out the small bubbles and sealing it up. I cranked up the temperature of the hot plate a bit to compensate for the addition of this huge piece of meat (the water was already at temperature), and all I have is to wait.
One drawback of this setup I have to admit is that I don’t have an automatic temperature logger. Therefore I’ll have to log it by hand. According to CFG, the target temperature for medium rare is 57 °C, whereas for medium it’s 60 °C. For the thickness of my tri-tip, if I want it to be done in 2 hours, I would need to target at 60 °C.
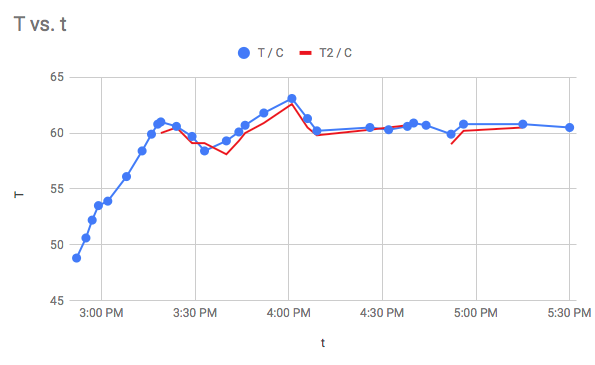
Note that the temperature stability isn’t great. I did not try very hard to optimize the PID parameters, instead I relied on the auto PID function of the controller, which isn’t the best. But for cooking beef this is probably okay.
Two hours into cooking, I took out the beef and cut it into pieces. Turns out it was more on the rare side. I might have underestimated its thickness. But fortunately I didn’t have it sit out for too long, so I just tossed it back into the pot and kept cooking.
Another two hours passed. Probably an overkill, but the beef should be ready. Indeed, it is more on the medium well side. I pan seared the pieces and started the feast!
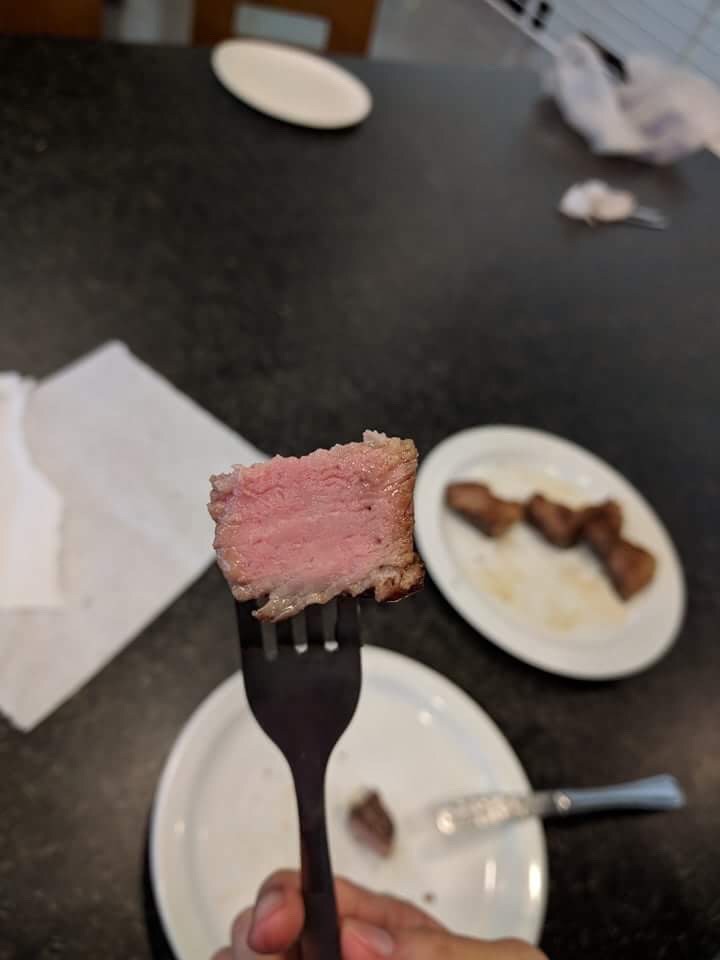
As it turns out, one of the best thing about sous vide is that the whole piece of meat is cooked to the same doneness! I think in terms of the texture, if I were to cook it for shorter, it would have been even more tender. But it already is pretty good! However I am not so satisfied with the seasoning. Maybe putting oil in the bag is really necessary. But it nevertheless tastes decent after sprinkling some salt on.
what did I learn
I like to make incremental improvements. The temperature instability and inhomogeneity get me thinking. First of all, my heaters aren’t particularly powerful. And of course, I don’t have a circulation system. To make some of the fancier sous-vide dishes, I really need to up my game upgrade my setup. I’ve got some pretty good ideas for el cheapo sous-vide machine! There’s gonna be an episode 2, hopefully even more. Stay tuned!
-
We normally use heater tapes for doing UHV bake-outs. ↩
-
Model number CSi32K. ↩